Chromebook How To’s for Substitute Teachers
- Turn on the Chromebook by pressing the Power key (Upper right-hand key). This key looks like a Power symbol.
If you have not enrolled in our Password management system go to #2 otherwise go to #3: - Before logging in, select the “Apps” icon in the bottom left corner by the shutdown icon, click SSRPM.
- Enroll using your Username and default Password
Username is the first initial of first name and first 7 characters of the last name.
Username example = Bart Simpson = bsimpson (Max 8 Charters)
Password = First initial of first name and first 3 characters of the last name, and last 4 of Social Security number)
Password example = bsim1234
- Select Enroll, choose 3 questions and answers you can remember.
- Change your password if you are still using the default from above - This step is important as it updates all of your systems. This will be your password for everything going forward.

- Log into the Chromebook
- You might want to open our main website www.molineschools.org
To project your display on the Epson projector:
- Turn on the Epson projector with the Epson remote.
- Connect the HDMI cable into the Chromebook. Look for this cable (see picture below)
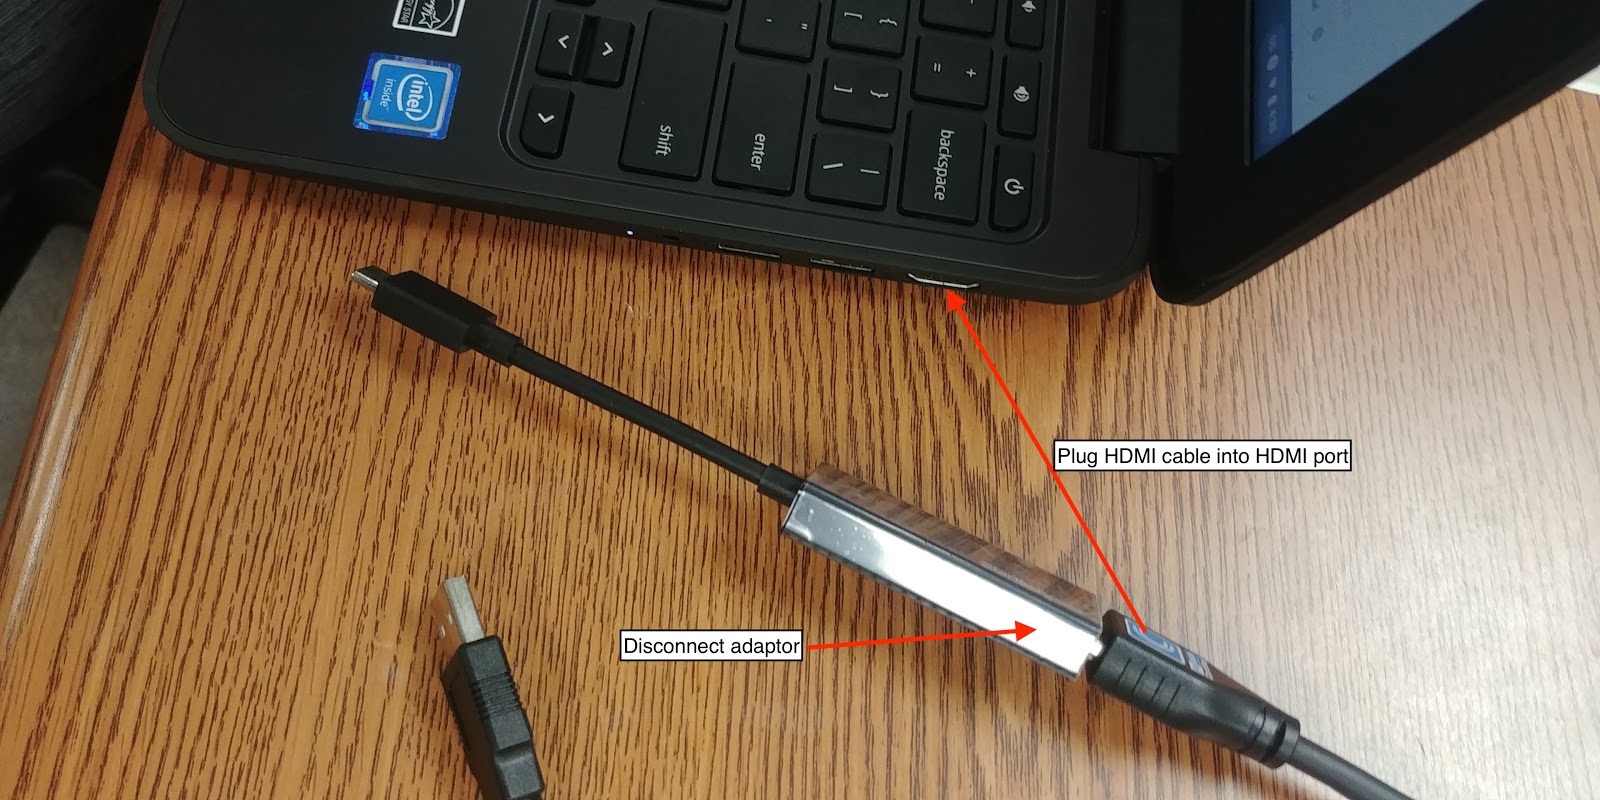
and disconnect the adaptor from the end (see above) and keep handy for the teacher as they need this adaptor for their MacBook laptop when they return.
To project your Chromebook to the board (Mirroring).
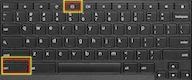
1) Press Control key and Display key  at the same time
Sound will play from the Epson projector so use the remote control to adjust the volume.
Smartboard:
Smart Notebook software is not available to the Chromebooks until the Web version is available so you will not be able to use a teacher provided Smart Notebook lesson.
USB Document camera (Newer Style-IPEVO & HoverCam Solo 8 - brand marked on each camera)
(If the room you are in has an older style Document Camera (SMART or AverMedia) it will not have a USB cord and will NOT need to be connected to the Chromebook. Using the Epson projector remote, press Source Search on the remote to find the image under the document camera).
- Turn on the Epson projector with the Epson remote.
- Plugin the Document camera USB cord into any USB port on the Chromebook.
(If the room you are in has an older style Document Camera (SMART or AverMedia) it will not have a USB cord and will NOT need to be connected to the Chromebook. Using the Epson projector remote, press Source Search on the remote to find the image under the document camera. Skip steps 3 & 4 below.) - Open IPEVO Visualizer by clicking the O or circle in the bottom left corner to search. Start typing IPEVO to find Ipevo Visualizer. Click to Open.
- Switch from the built-in camera to the Document camera by selecting the Camera icon top left corner.
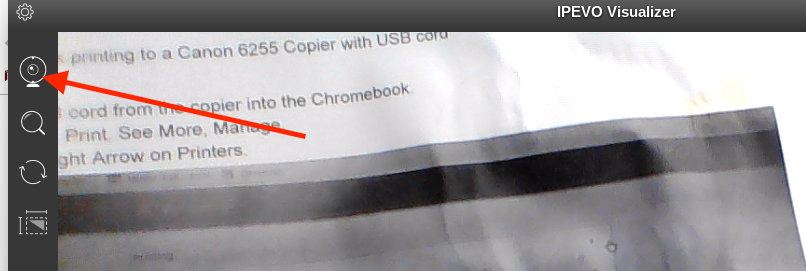
On the select camera dialog box, click up/down arrows to switch from the “HP TrueVision HD Webcam to the Document camera named VZ-R #1 or HoverCam Solo8.

DVD movies:
Chromebooks will not play DVD movies. A conventional DVD player will be available in the main office.
Please contact the main office if you have any other technology issues throughout your day.